The Secrets How to Take Apart an Xbox Controller Like a Pro
Are you ready to dive into the inner workings of your Xbox controller? Whether you’re looking to customize it, troubleshoot an issue, or simply curious about what lies beneath the buttons and joysticks, learning how to take apart an Xbox controller is a valuable skill for any gaming enthusiast. In this comprehensive guide, we’ll walk you through the step-by-step process, ensuring that you can confidently disassemble and reassemble your Xbox controller like a pro.
Why Take Apart Your Xbox Controller?
Before we delve into the nitty-gritty details, it’s essential to understand the benefits of taking apart your Xbox controller. This process allows you to:
- Customize Your Controller:
- Personalize the appearance by adding custom buttons, shells, or designs.
- Modify the internal components for improved performance.
- Troubleshoot Issues:
- Diagnose and fix common problems like unresponsive buttons or joystick drift.
- Clean the internal components to maintain optimal functionality.
- Upgrade or Replace Parts:
- Swap out worn-out parts or upgrade components for a better gaming experience.
- Extend the lifespan of your controller by addressing potential issues.
How to Take Apart an Xbox Controller
Getting Started
Gather Necessary Tools:
- Before you begin, ensure you have the following tools on hand:
- Torx screwdriver (T6 and T8)
- Plastic opening tools or spudgers
- Tweezers
- Small Phillips-head screwdriver
Prepare Your Workspace:
- Choose a clean, well-lit area with ample space to lay out the controller and its components. A soft cloth or mat can prevent scratches on your controller or workspace.
Disassembling the Xbox Controller
Removing the Battery Pack
Begin by taking out the battery pack if your controller has one. This step ensures safety and prevents accidental power-ups during disassembly.
Also read: Entertainment Exploring KBH Games Unblocked
Removing Screws
- Use the T6 Torx screwdriver to remove the screws located in the battery compartment.
- Locate and remove the hidden screw beneath the barcode sticker on the back of the controller using a plastic opening tool.
Opening the Controller
Carefully use the plastic opening tools to pry open the controller along the seams. Take your time to avoid damaging the plastic clips that hold the controller together.
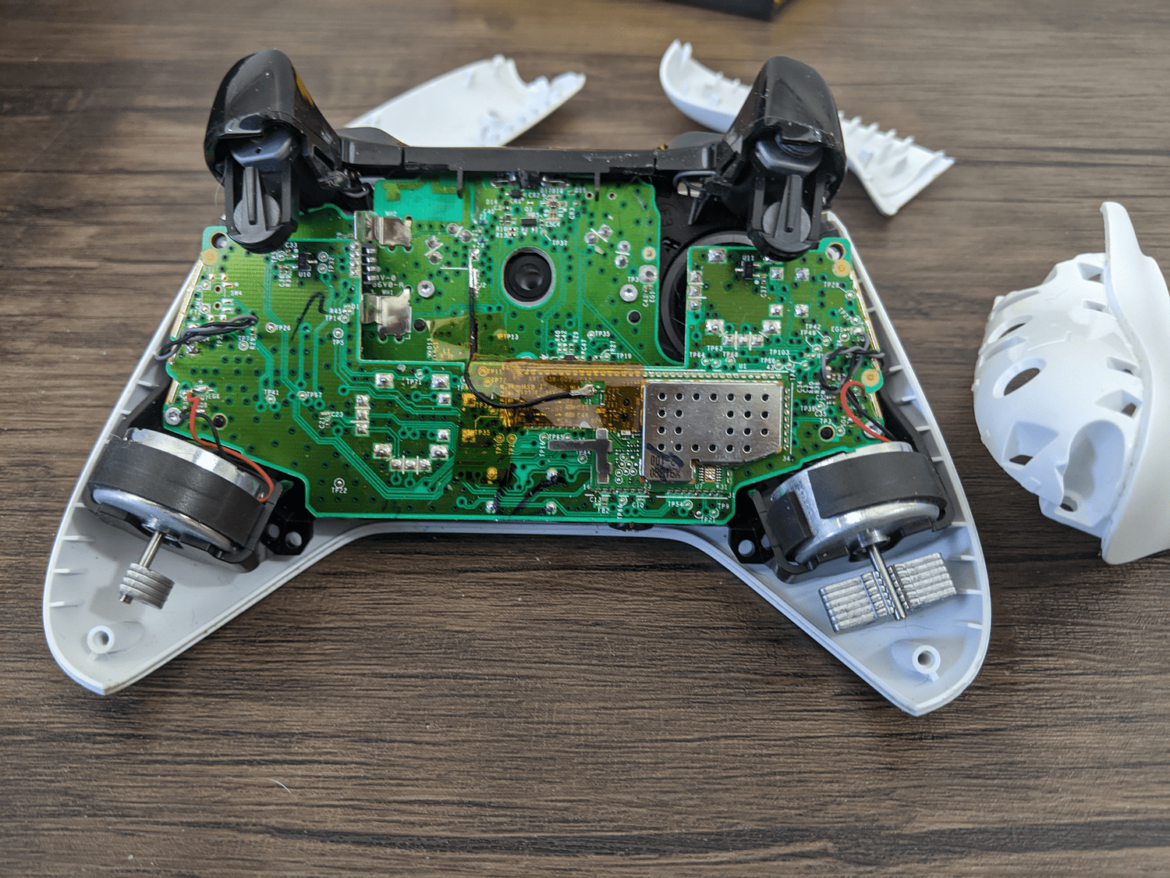
Disconnecting Internal Components
- Gently lift the front cover to reveal the internal components.
- Disconnect the ribbon cables attached to the front cover by carefully releasing the connectors.
- Remove the screws holding the circuit board in place using the Phillips-head screwdriver.
- Lift the circuit board, exposing the buttons, triggers, and joysticks.
Reassembling Your Xbox Controller
Reconnecting Internal Components
- Place the circuit board back into position and secure it with the screws.
- Reconnect the ribbon cables, ensuring they are firmly attached.
- Carefully align the front and back covers, snapping them back together.
Securing the Controller
- Replace the screws in the battery compartment and beneath the barcode sticker.
- Insert the battery pack.
FAQs:
Can I take apart my Xbox controller multiple times?
Yes, you can safely disassemble and reassemble your Xbox controller multiple times, provided you follow the proper steps and handle the components with care.
Are there any risks to taking apart my Xbox controller?
While taking apart your controller is generally safe, there is a risk of damaging internal components if not done carefully. Always follow a guide, use the correct tools, and exercise caution to avoid issues.
Can I customize the appearance of my controller?
Absolutely! Taking apart your Xbox controller allows you to customize its appearance by adding unique buttons, shells, or designs. Just ensure that any modifications you make are compatible with your controller model.
Conclusion:
Congratulations! You’ve successfully learned how to take apart your Xbox controller, unlocking a world of customization and troubleshooting possibilities. Remember to take your time, follow each step carefully, and enjoy the process of exploring the inner workings of your gaming gear. Whether you’re a seasoned gamer or a curious enthusiast, mastering this skill empowers you to enhance your gaming experience. Now, go ahead and make that Xbox controllers truly yours!
1 thought on “The Secrets How to Take Apart an Xbox Controller Like a Pro”